Introduction
Tes Timetable syncs directly to your school SIMS database. It’s important to note that SIMS struggles to deal with significant structural changes and therefore we recommend that you don’t attempt to sync your TES Timetable file until it is complete.
Please review the following document BEFORE starting on this process
SIMS: Integration Multi-Grid Part 1
IF YOU ARE USING a single Grid please refer to the following document instead
Please note we understand that most SIMS schools are now been moved to SIMS Connected
And as such you will need to use a “3rd Party Connector” - that is a local workstation/server that has a VPN configured by ESS / Parent Pay Group on your network. E10 must be run on that machine to perform the synchronization.
Schools will be using more of the functionality in SIMS Next Gen, but at present the timetable is still synched via the “3rd Party Connector”.
The route is E10 to 3rd Party Connector” to SIMS 7 SQL Database to SIMS Next Gen.
With regard to Multi-Timetable the segment creation still MUST be done in SIMS 7, that functionality does not yet exist in SIMS Next Gen.
Please read this document in full before attempting to sync your file to SIMS. It covers the following areas:
- Initiating the SIMS Sync
- Configuring the Sync
- Preparing your Tes Timetable .etz file for the SIMS Sync
- Using DERIVED and ALTCURRICULUM years
- Dealing with Registration Groups
- Importing data via the Sync Tool
- Publishing the Period Grid
- Publishing the Timetable for the first time into a new year
- Applying the Timetable
- Post-sync Checks
- Maintaining your Timetable and Resyncing
Initiating the Sync
In your .etz file go to File / Synchronise / Configure
Select Sync at the top of the screen
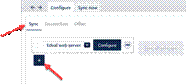
If you don’t see SIMS (direct) in the list on the screen, then click the plus button to add it
This is used if you host SIMS locally remotely or with ESS via SIMS Connected.
If using SIMS Connected you will need to use a “3rd Party Connecter” that is a local workstation / server that has a VPN configured by ESS on your network. If using the “3rd Party Connector” then the E10 MUST be run on that machine to perform the synchronization.
Click the Configure button
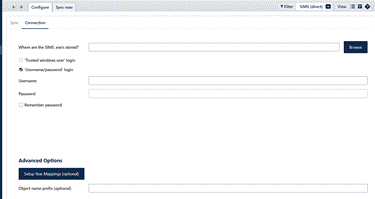
Where are the SIMS. exe’s stored this can be browsed to by click the button but will be like
“C:\Program Files (x86)\Capita\SIMS\SIMS .net”
If in doubt open the SIMS.ini file that can be found in the folder C:/Windows
This will contain something like this
[Setup]
SIMSDirectory=C:\SIMS
SIMSSetupsDirectory=C:\SIMS\Setups
SIMSDotNetDirectory=C:\PROGRA~2\SIMS\SIMS~1.NET
Folder=SIMS Applications
It is the SIMSDOTNETDIRECTORY that is required.
The Username and password is the SIMS User that has at least “timetable” and “curriculum manager” rights in SIMS / System Manager. We do not advice using the “Remember Password” option as reduces security in the system.
Advanced Options.
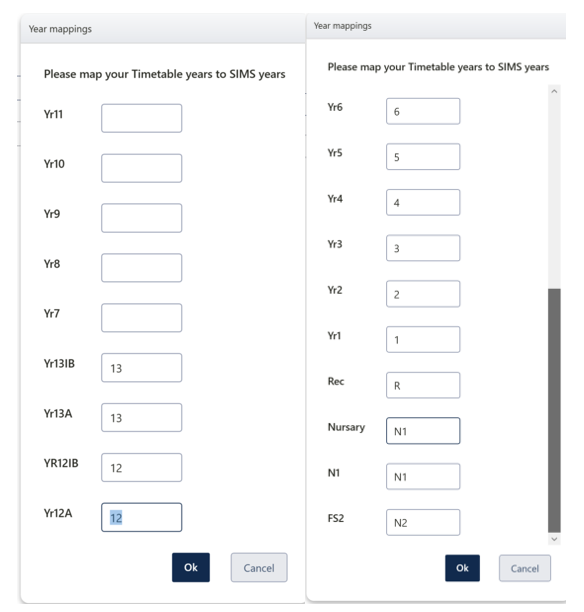
If the names of the years in your files do not match your National Curriculum years in SIMS then click ‘Setup Year Mappings’ to identify these.
It is not necessary to map the Meetings year or indeed any year which does not contain National Curriculum classes.
Multiple Mappings
It is now possible to map multiple years in Tes Timetable onto one year in SIMS. This may be useful if some year groups are divided into two across different campuses or you have separate years set up in Tes Timetable for IB and A level courses.
File / Configure / Connection
Click the Setup Year Mappings (optional)
The “Object name Prefix (optional)” can be used when downloading a version of the timetable when the curriculum is starting early. Refer to the document for further information:
SIMS: Starting the new Academic Year early
The following documents may be relevant for your setting
SIMS: Setting up Registration Classes
SIMS: Setting up Alternative Curriculum Classes
Health Check
From the Tes Timetable home screen, the Health Check now shows potential errors/omissions which could prevent your file from syncing correctly
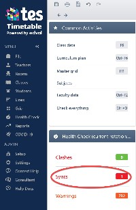
To view these errors, go to Health Check > Syncs
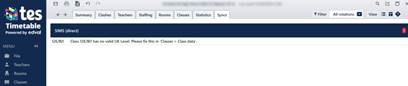
Resolve all errors before proceeding. Please contact us if you have difficulty resolving any issues.
The column UK Level MUST be populated the valid codes, please note it is case sensitive.
The supplied document “SIMS: Current UK Levels" provides the full list of codes used by SIMS. (This equates to the Levels in Nova T).

Course descriptions
Setup > Subjects > Official Course Data

Ensure that every course has a description.
Note that the description itself is unimportant, it is simply a requirement from SIMS that this field is not blank.
Labelling
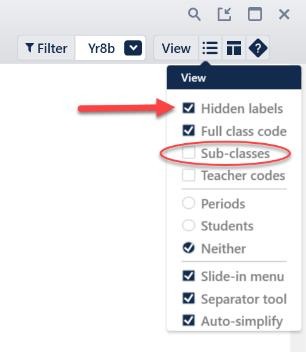 All blocks in the Curriculum Plan should be clearly labelled to facilitate easier Curriculum Assignments in SIMS. Labelling these at a later stage can sometimes be problematic and therefore we recommend you spend time checking these prior to the initial sync
Classes > Curriculum Plan
View > Show Hidden Labels
Make sure that Sub-classes are unticked at this stage.
Everything you see on screen now will appear in SIMS and any untidy labels should be corrected at this stage.
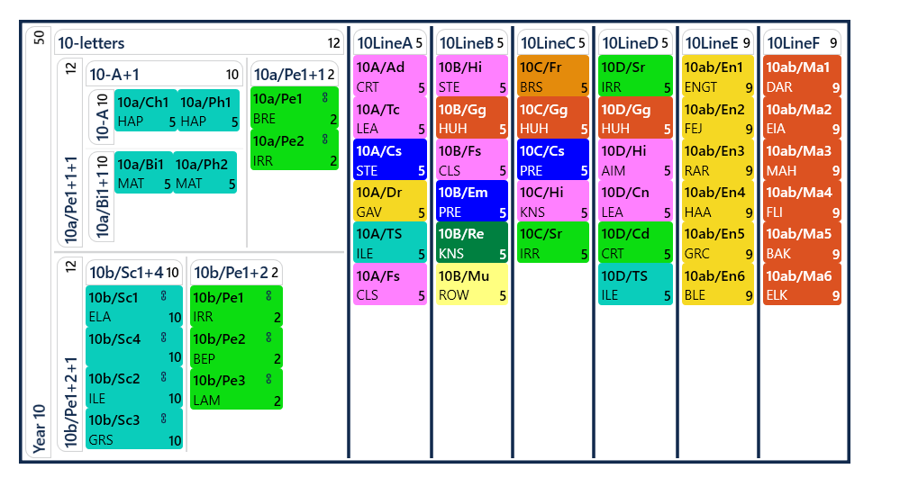
Note: There are two types of labels which appear in the curriculum plan: those to the left of an object and those above an object. SIMS requires that labels to the left of an object should have a maximum of 10 characters.
It could be changed to look like this
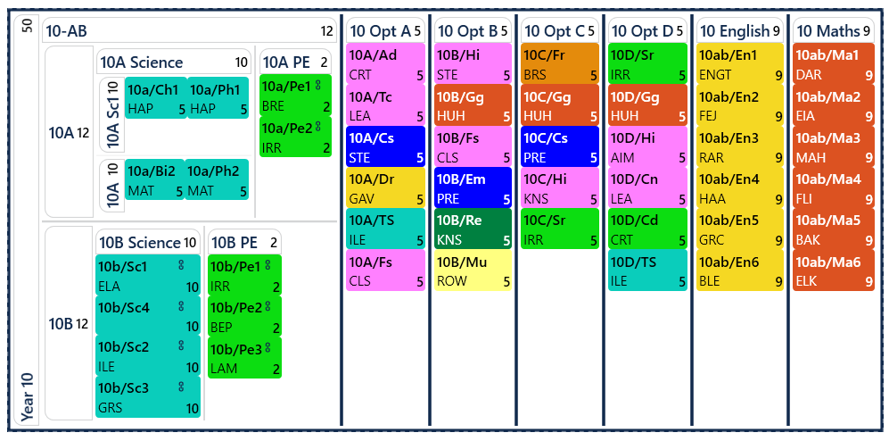
DO NOT CHANGE THE LABELS AFTER THE FIRST EXPORT or you will need to re-allocate students to classes.
Filler periods
If you have used Filler periods to support your structure, then it is usually not desirable to export these to SIMS. Enter the letter N in the Exportable column if you wish to prevent this.

AT THIS POINT YOU WILL NEED TO EMAIL YOUR FILE TO US BEFORE YOU SYNC FOR THE FIRST TIME
Please email timetable.support@tes.com and attach a copy of your Tes Timetable file.
We will check your file and return it to you with the password straight away.
IMPORTING DATA from SIMS into E10
There is the manual method Files / Import Data / …. This will use csv files, and we would advise this route as the data can be better managed especially if you only want a particular year group for Lines etc:
Publishing the Period Grid
This guidance is only relevant for those that have the Multi-Timetable Licence applied to the SIMS database.
If you do not have this license please contact your SIMS Account Manager, it is a chargeable upgrade.
This “Publish : Period Grid” IS NOT used when using a SIMS Multi-Grid the Period Grid is managed in SIMS and is linked to the Tiers.
If you attempt to publish the Grid with a multi-grid licence you will get the following.
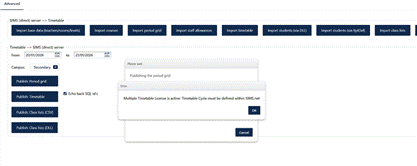
DO NOT TRY TO PUBLISH THE GRID
Publishing the Timetable
Once the period grid has been published to SIMS you can now publish the timetable.
ALWAYS TAKE A BACK UP OF SIMS BEFORE PUBLISHING THE TIMETABLE FOR THE FIRST TIME
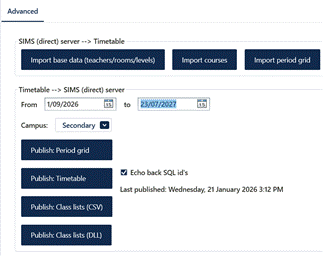
Once again check that the dates are correct
Select the Campus Required, in the is example EYFS / Primary / Secondary.
DO NOT SYNC THE DEFAULT GRID it will wipe your curriculum
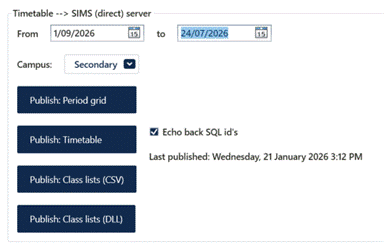
Note that if you have rotations set up in your file an addition drop down box will be visible.

Please select the correct rotation (usually Rotation 1 for September) before clicking Publish Timetable. When it’s time for the next rotation you will need to select Rotation 2, enter the relevant dates and publish the timetable again.
Please note with regard to rotations we would suggest having the structure in E10, and then rotate the students in the SIMS Academic Schemes
On clicking the publish button the following pop up will appear
Tick the two boxes and click OK 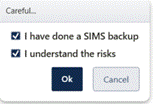
If you are presented with the following message
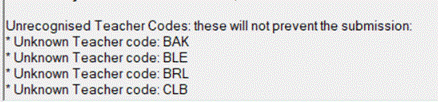
The lack of teacher codes will NOT prevent the transfer those staff will be missing timetables etc: A similar message will appear if room codes are not found.
You will need to add those teachers to Manage Classroom Staff in SIMS.
Focus / Person / Manage Classroom Staff
Important: The new staff needs to have been added to the staff database with a start date.
If a staff member has changed name and staff code, then ensure the new code is used in E10 before transfer.
The route in SIMS that should be used to create new rooms is Focus / School / Rooms.
The following examples of error messages both indicate that you have not set up the Segments correcting in SIMS
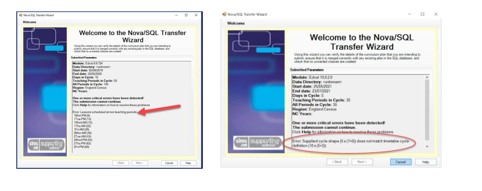
When running the publish timetable you might see the following
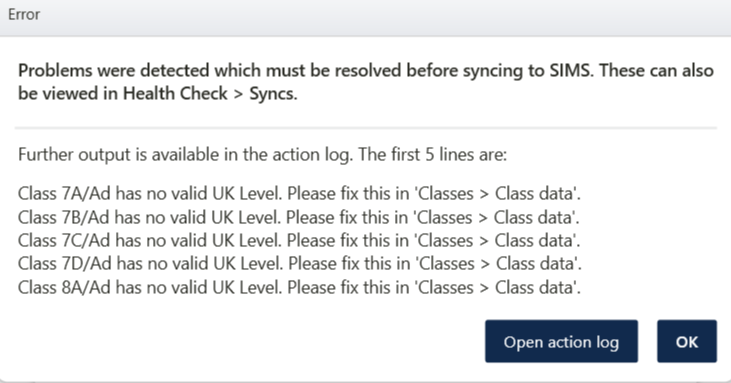
This indicates that you have NOT added valid codes into the UK Level in the class data.
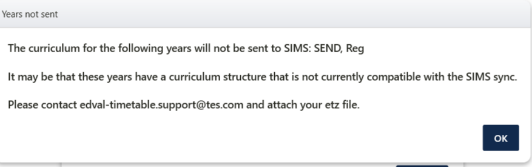
This means there are some year levels that do not exist in SIMS, the only valid year levels and are not mapped to a year levels are DERIVED, ALTCURRICULUM, Intervention and Meetings
If there are no error message you will see the following window, the segment visible will be the campus selected previously.
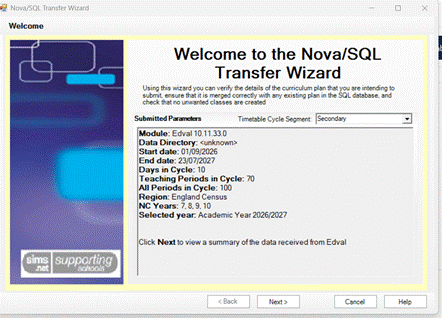
***IMPORTANT***
When publishing for the first time it is expected that all elements will be “unlinked”.
This will be shown here. Check the number of bands and blocks.
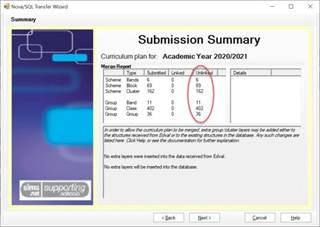
And the following screen (with the grey box on the right) as below will demonstrate that no previous curriculum structure exists in SIMS for this new academic year.
It is very Important to check the structure, is this the structure you want to send through to SIMS?
If you see unexpected curriculum names here, then cancel the sync and contact timetable.support@tes.com for advice.
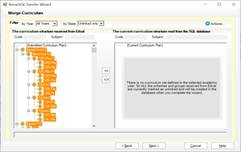
Click next
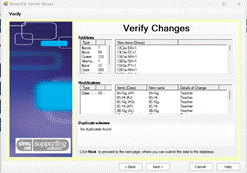
Click Next
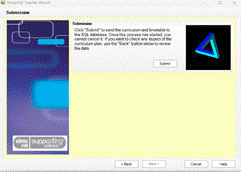
Click Submit this can take some time.
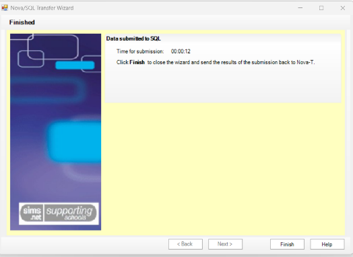
Click Finish and this pop up indicates the sync is complete.
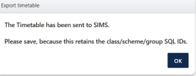
Repeat for each Campus
The process of applying the timetable and the lesson monitor settings is explained at the end of this document
SIMS: Integration Multi-Grid Part 1
Maintaining your timetable and resyncing
During the academic year it is normal to expect to make regular timetable changes, swapping teachers and rooms etc. After making these changes in Tes Timetable you will need to sync the timetable to SIMS again.
Note: Changing the Cycle in SIMS is a significant event and SIMS recommend that this should not be done again once the academic year has started. If you need to change the cycle mid-year please consult your SIMS support company.
Once again check that the dates are correct (NEVER USE A START DATE IN THE PAST)
Select the Campus to be transferred click Publish Timetable. You only need to publish the campus that has changed. If necessary, repeat for each grid
In these situations, it is important to ensure that the curriculum matching wizard displays only objects that you expect to see. For example, when a new class is added this can be seen on the submission summary and subsequent screens as being the only unlinked item:
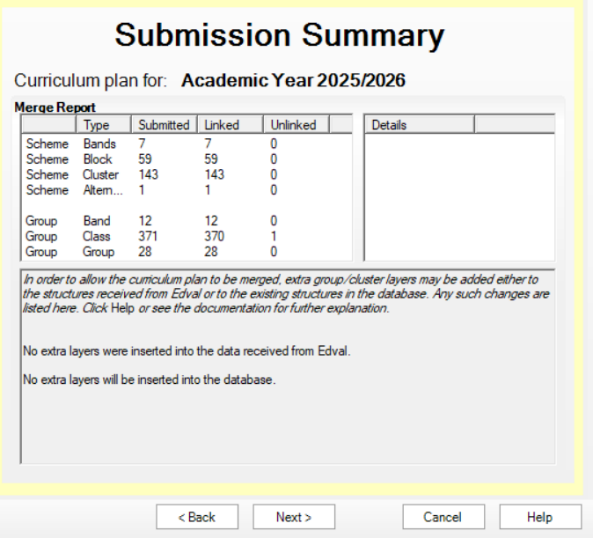
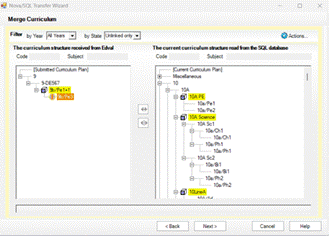
If you see unexpected numbers of unlinked items here, then cancel the sync and contact timetable.support@tes.com for advice.
Note: changes to teachers and/or rooms on existing classes will not appear in these two screens as these are not structural changes.
Was this article helpful?
That’s Great!
Thank you for your feedback
Sorry! We couldn't be helpful
Thank you for your feedback
Feedback sent
We appreciate your effort and will try to fix the article