TABLE OF CONTENTS
Preamble
Before building the timetable in the Master grid, it is very important to ensure each year level has the correct structure. This document explains how to use Classes > Year structure to identify issues and sign off when the structure is verified.
IMPORTANT
Don't skip checking the Year structure to ensure every student in every year level is ‘doing something’ for every teaching period in the cycle as required, and the combination of classes on a line or in groups are correct.
Before accessing Year Structure
For every year level, go to Class data and Period allocations to check that:
- every class is entered
- the number of available periods has not been exceeded
- the Line column has correct entries
Class data (F6)
Line column
- Double-click on the Line column to sort.
- Every class (except system-defined Study classes) must have an entry in the Line or Link column, or both.
- The entry in the Line column may be a Line or Group.
- If the Line column is blank then class A must be linked to another class B.
- If both Line and Link columns are empty, the system will be confused and there will be a row called 'Error classes' in the first table of Period allocations.
Spread
- If all classes on a line have the same number of periods then all classes must have the same Spread entry.
Refer to E10 - Class Data ( F6 ) overview for more details.
TIP
Period allocations is effective for identifying errors. If all tables are correct, most Year structure issues can be avoided. It's much better to find any errors prior to staffing and scheduling on the grid.
Period allocations
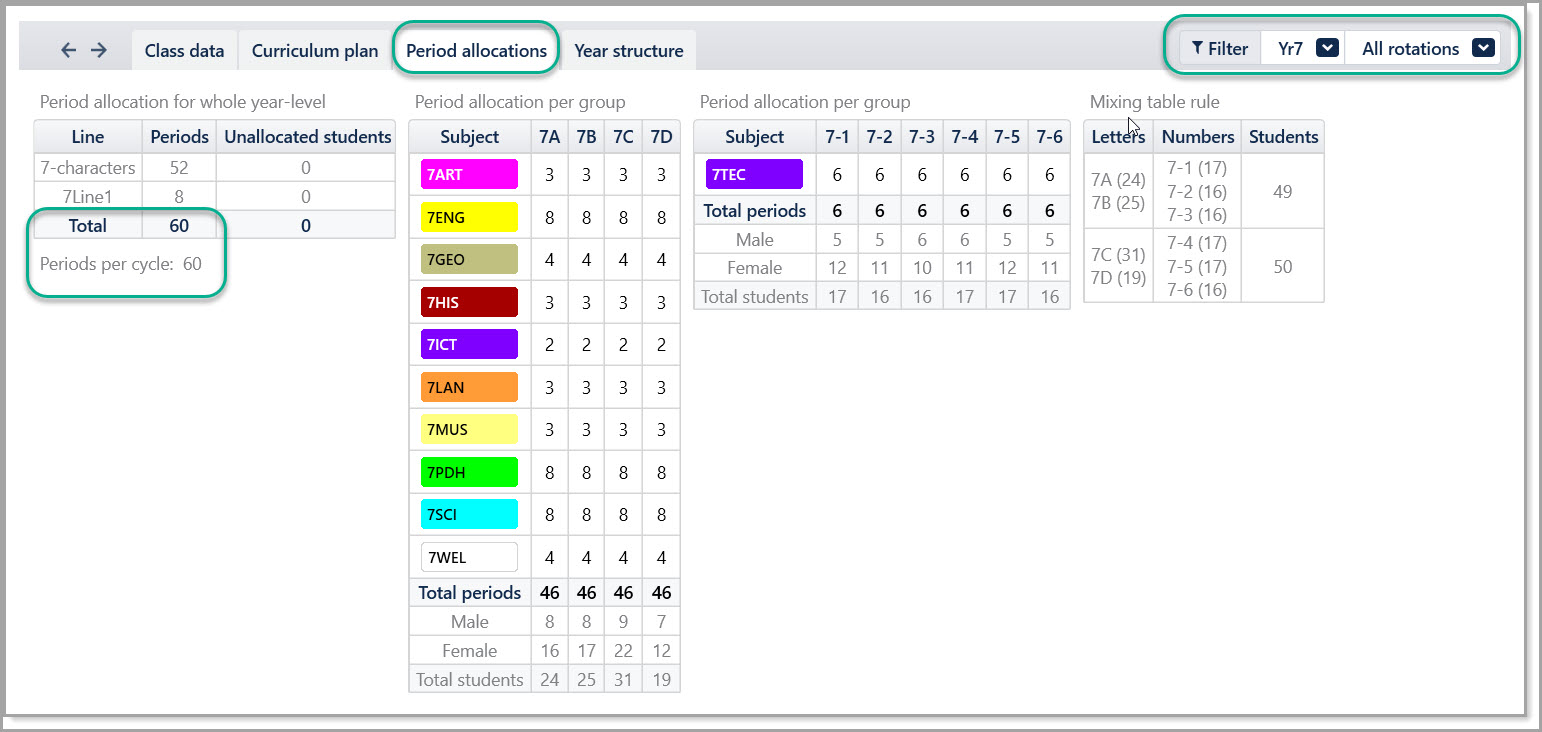
Period allocation for whole year-level table
- The Total in the first table must equal the 'Periods per cycle' (number of white teaching periods in Grid structure).
Period allocation per group tables
- Each letter/number group must have the same overall Total number of periods, even if each group has a different number of periods for individual subjects.
Rotations
- Select various rotations from the dropdown and check the number of periods.
- Using 'All rotations' will display the average number of periods for a rotated subject across the whole year level.
How to use Year structure
- Navigate to Classes > Year structure for the year level to be checked, or press ctrl-L in Class data.
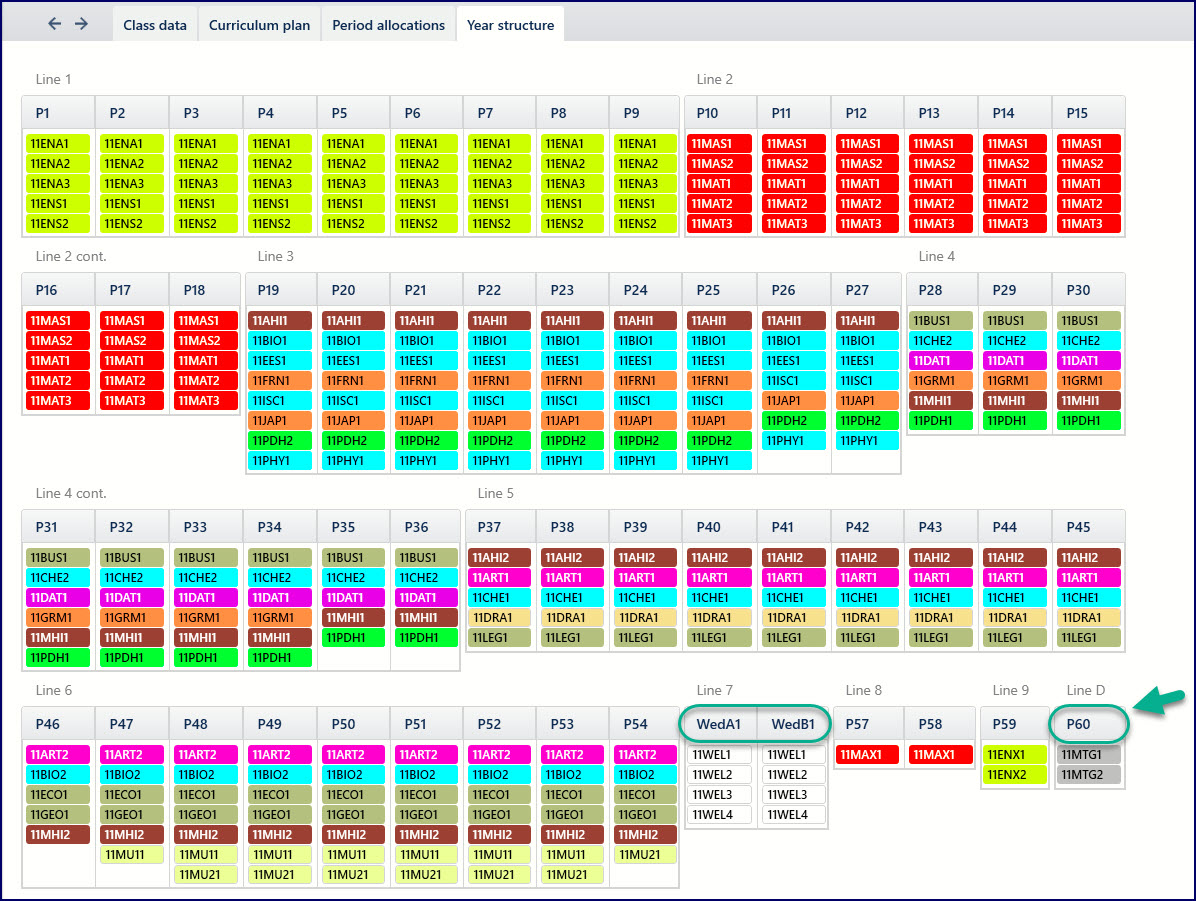
- It displays a graphical representation of how the system interprets the requirements entered in Class data, helping you understand and verify the structure.
NOTE
Every column in the Year structure should have one or more classes.
Example
- The Grid structure has 60 (white) teaching periods, so there should be 60 columns in total, labelled P1 to P60.
- If a class or line is hardcoded to a particular period, it replaces the column label, e.g. Line 7 runs on WedA1, WedB1.
- Where classes run on Lines, the Line number appears in the row above the column label.
Actions
Shuffle
lick Action > Shuffle to see different valid arrangements allowed by your data.- Sometimes the same arrangement appears, other times there are slight differences as classes and sublines within a line are rearranged.
- Shuffle several times to check for anomalies or unwanted combinations.
Sign off/Unsign
- Click Action > Sign off to confirm this year level has been manually verified correct.
- Green/red tick means the year level is signed off/not signed off.
- Ensure the structure meets your requirements before signing off.
- System checks may not catch all possible issues, or reflect specific curriculum needs apart from what is defined in Class data.
Interactive View
- Click Action > Interactive View to see the same information in a master grid format.
- Use the swap operations to move classes around to explore what is possible, what is not and why.
- Double-click on a cell to go to the definition of that class.
Options
- Click the View menu on top right to display either Subjects or Course codes.
What to Look For
Are there any gaps?
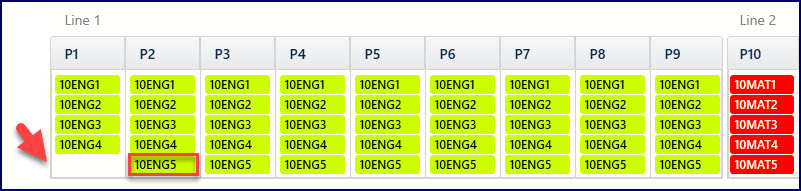
- If a column shows fewer classes than expected (e.g. 4 instead of 5 10ENG), this indicates a missing class, incorrect period count, or an error in the Line column.
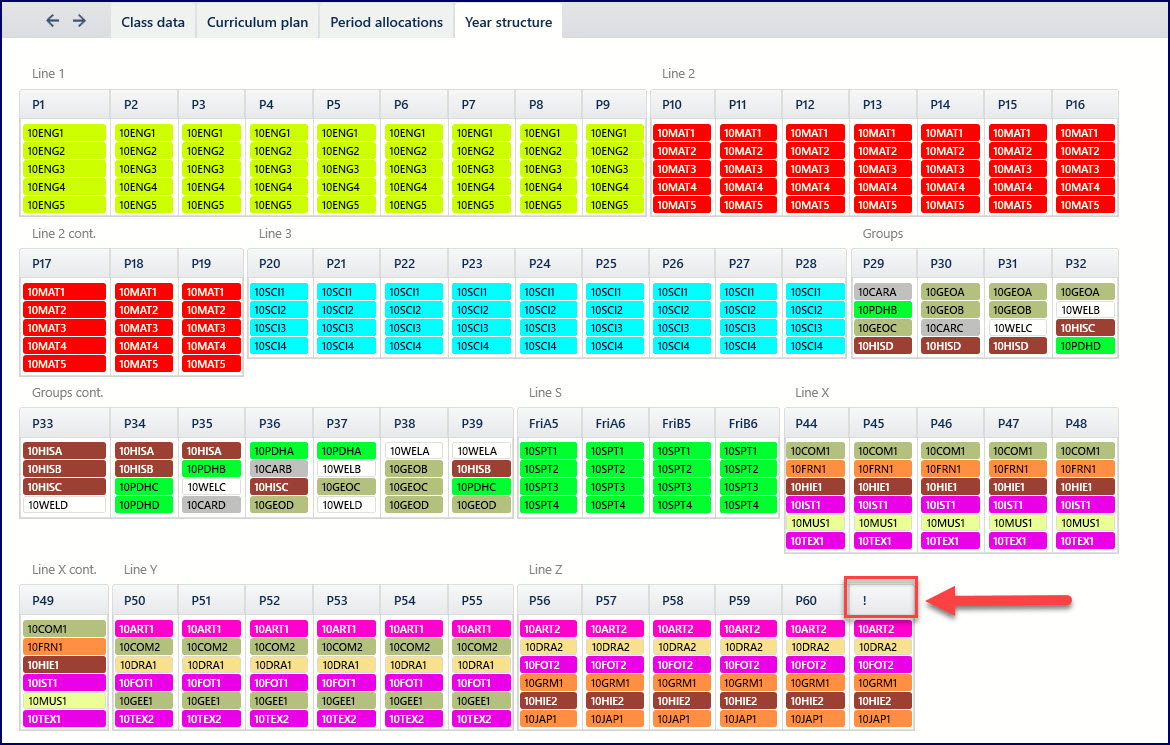
Are there extra columns, marked with '!'?
- Columns should be from P1 through to the total number of teaching periods per cycle.
- Extra columns marked '!' indicate too many classes, too many periods, or classes not overlapping when they should ('Line' column error).
- It is not necessarily the classes under the ‘!’ that are causing the problem.
- In the example below, there were 10 periods, instead of 9, allocated to the 10MAT classes.
Are the streamed classes/electives lined up? Are the groups mixing correctly?
- Click 'Shuffle' to reshuffle the lessons to display an alternative assignment. This will confirm to what extent things are fixed and to what extent things are flexible.
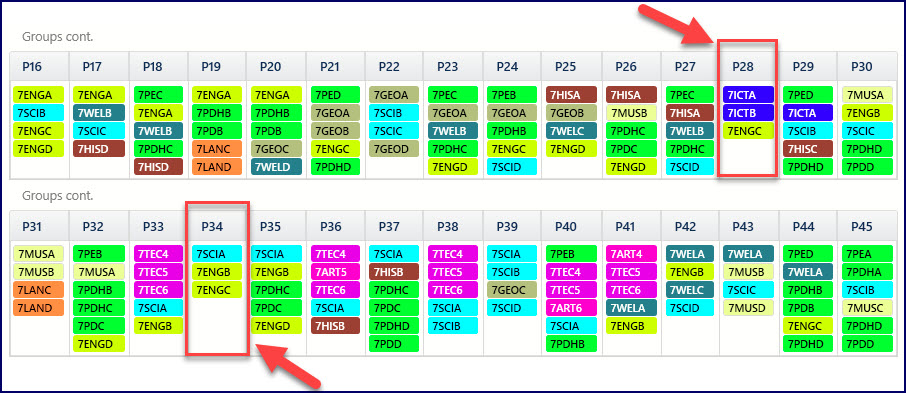
- In the example below, there are several periods where the students in group D are not allocated to a class.
- Often, it is easier to find the anomalies by checking Period allocations, mentioned earlier.
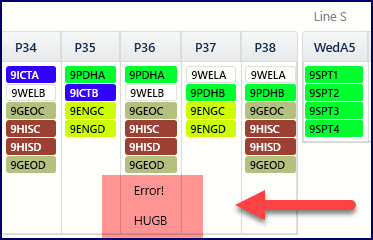
Are there 'Error!' entries?
- An 'Error!' indicates the line cannot be allocated at all, given how it has been set up.
- Common causes include the same teacher or same room required twice in the line, or insufficient teachers/rooms to satisfy the line, or incorrect period totals in grouped classes.
Was this article helpful?
That’s Great!
Thank you for your feedback
Sorry! We couldn't be helpful
Thank you for your feedback
Feedback sent
We appreciate your effort and will try to fix the article