TABLE OF CONTENTS
- Preamble
- Type of sync
- Which data is sent to the other system?
- Other important information
- Steps to Synchronise data
Make sure that your region in 'Setup > School info > Admin' is set to UK or Ireland.
The SchoolBase sync will not appear in sync drop-down if the incorrect region is selected.
Preamble
Timetabling data that exists in Timetable files is usually sent on to one or more other non-Tes systems, such as student learning management systems, reporting systems, administration systems, and many more. The Tes integration team works with other systems to make sure that the data required to be sent is in the correct format. This document outlines the synchronisation process to SchoolBase.
While Tes takes all care to ensure any mention of the other system is correct and up to date, it is the user's responsibility to check with the other system prior to an initial sync. If the user becomes aware of any changes to the other system, we would very much appreciate this feedback.
Type of sync
This sync is performed by exporting a csv file that has been correctly formatted, ready to be uploaded into SchoolBase.
The SchoolBase export function will export the following CSV files:
- CLASSLISTS
- TTEXP-T
Which data is sent to the other system?
This table lists many of the data and features found in Tes and, where known by Tes specialists, whether they are also understood by the other system.
Note that Tes builds many excellent features to help users build high-quality timetables, and while these features can be sent onto the other system through the synchronisation process, not all systems have built the capability on their end to receive/display these features.
| Tes Timetable feature | Notes on feature | Has this feature received by the other system? | Other notes |
| Bell times | Bell times as per the Grid structures | No | |
| Campuses | Campuses and their associated rooms | No | |
| Classes | Classes as per Class data screens | Yes | |
| Class lists | Yes | ||
| Composite classes (linked classes) | One teacher teaching more than one class at the same time | No | |
| Duty roster | No | ||
| Faculty data | No | ||
| Grid structure codes | No | ||
| Multi-file | Two (or more) timetable files | No | |
| Multi-grid | Multiple grids with different bell times | No | |
| On-call roster | No | ||
| Priority classes | The priority class that shows on students' timetables where they have class clashes | No | |
| Room data | Room Code, Name, Size, Campus, Comment | Yes | |
| Rotation classes | Classes from particular rotations | No | |
| RTO roster | No | ||
| Student data | Student Code, Name, Preferred name, Year level, Letter group, House, Gender, StatewideID, Email, Phone | Yes | |
| Study roster | Study classes, staffing and rooming roster | No | |
| Sub-classes | No | ||
| Teacher data | Teacher Code, Name, Preferred name, Faculty, Gender, Email, Phone | Yes | |
| Teacher days off (Unavailables) | No | ||
| Timetable data | Yes | ||
| Two (or more) rooms at once | No | ||
| Two (or more) teachers at once | No | ||
| Year levels (non-numeric) | Year levels such as SPT, LSUP, ROLL, Yr9+10, etc. | No |
Other important information
Your timetable file teacher codes must match your SchoolBase teacher codes. Otherwise, those lessons won’t be published. Change them in either the timetable file and/or SchoolBase until they’re all matching.
Similarly, you need to ensure that your timetable file room codes match your SchoolBase room codes.
Steps to Synchronise data
Step 1: Check if any SchoolBase setup is required
Many systems require some setup prior to receiving timetable data from the timetable file. Check with SchoolBase.
Step 2: Configure the Timetable file
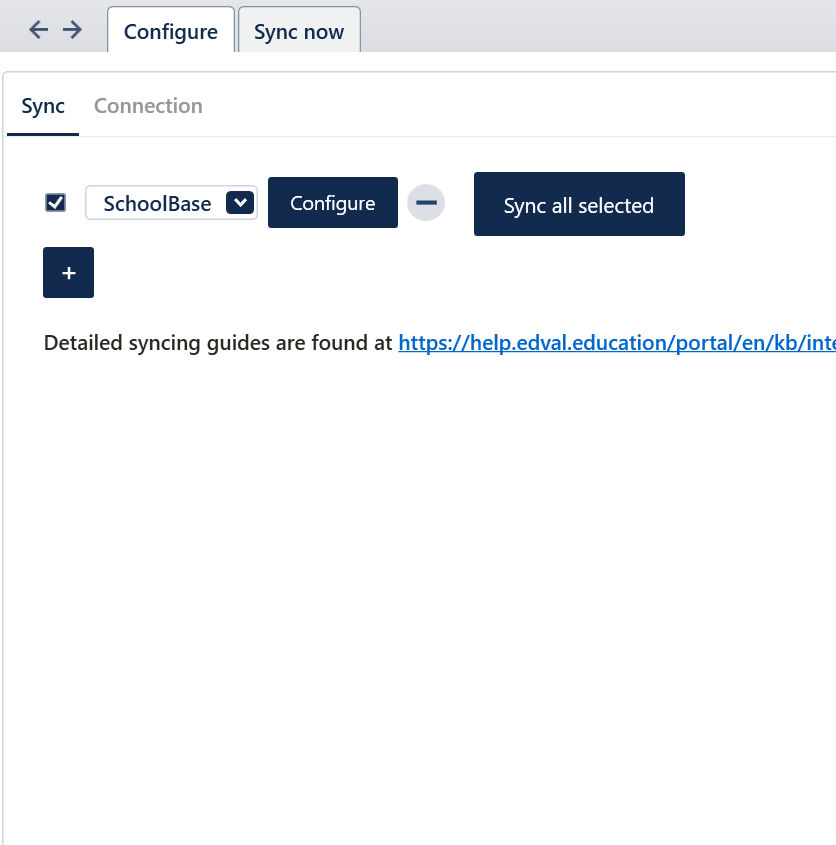
- Go to File>Synchronise>Configure>Sync
- Click the plus sign and select ‘SchoolBase’ from the new dropdown.
- Click on Configure.
- On the Connection tab, ensure that ‘SchoolBase’ is selected in the top-right corner.
- Click ‘Browse’ to configure a destination folder (this is where the file is saved).

Sync each time you save - This means sync will occur automatically on a Ctrl-S save. In this case, data is first saved locally to disk, and then an attempt is made to sync with all external systems. This is simple, but you may want to disable this if the external systems or your network are slow to sync, or you want more control over 'when' you publish data through to other systems. No message is shown on a sync-on-save, as it is done quietly. Only active sync via menu/ctrl-K will show a completion message.
Edit period mapping: In this screen, you set up a mapping from timetable file periods to SchoolBase “period numbers”. Typically, the SchoolBase period numbers start at 1 for MonA's first pseudo-period, and they increment all the way up to, e.g. 60 or however many teaching & non-teaching periods you have in your cycle.This configuration information, i.e. the folder and period mapping and everything else, is stored in the timetable file, so you’ll need to save the file for this to be remembered.

This configuration information, i.e. the folder and period mapping and everything else, is stored in the timetable file, so you'll need to save the file for this to be remembered.
Step 3: Perform the sync export
- Go to File>Synchronisation>Sync now.
- Ensure ‘SchoolBase’ is selected from the dropdown in the top-right corner.
- Select Create TT publish file.

4. The two Excel files that are created, called ‘TTEXP-T and ‘CLASSLISTS, are in the folder that was specified earlier.

The table below explains what type of data each txt file contains when exported.

Step 4: Upload/Import the CSV files into SchoolBase
For information on how to import this to SchoolBase, please contact the SchoolBase support team.
Was this article helpful?
That’s Great!
Thank you for your feedback
Sorry! We couldn't be helpful
Thank you for your feedback
Feedback sent
We appreciate your effort and will try to fix the article