Though the custom export feature was initially developed as a synchronisation tool, it's become apparent that it is also great for report generation. So in the event that there's data you want out of the timetable file that can't be done from the Reports section or by exporting a specific screen to excel, you can find a way to extract it through the custom export function.
For example, say there was need of a master document that shows each class, it's teacher and the students within. There are a few methods which can get close to this, but with a properly configured custom export you can make it suit your specific needs and be repeatable at the click of a button.
Generating a Custom Export
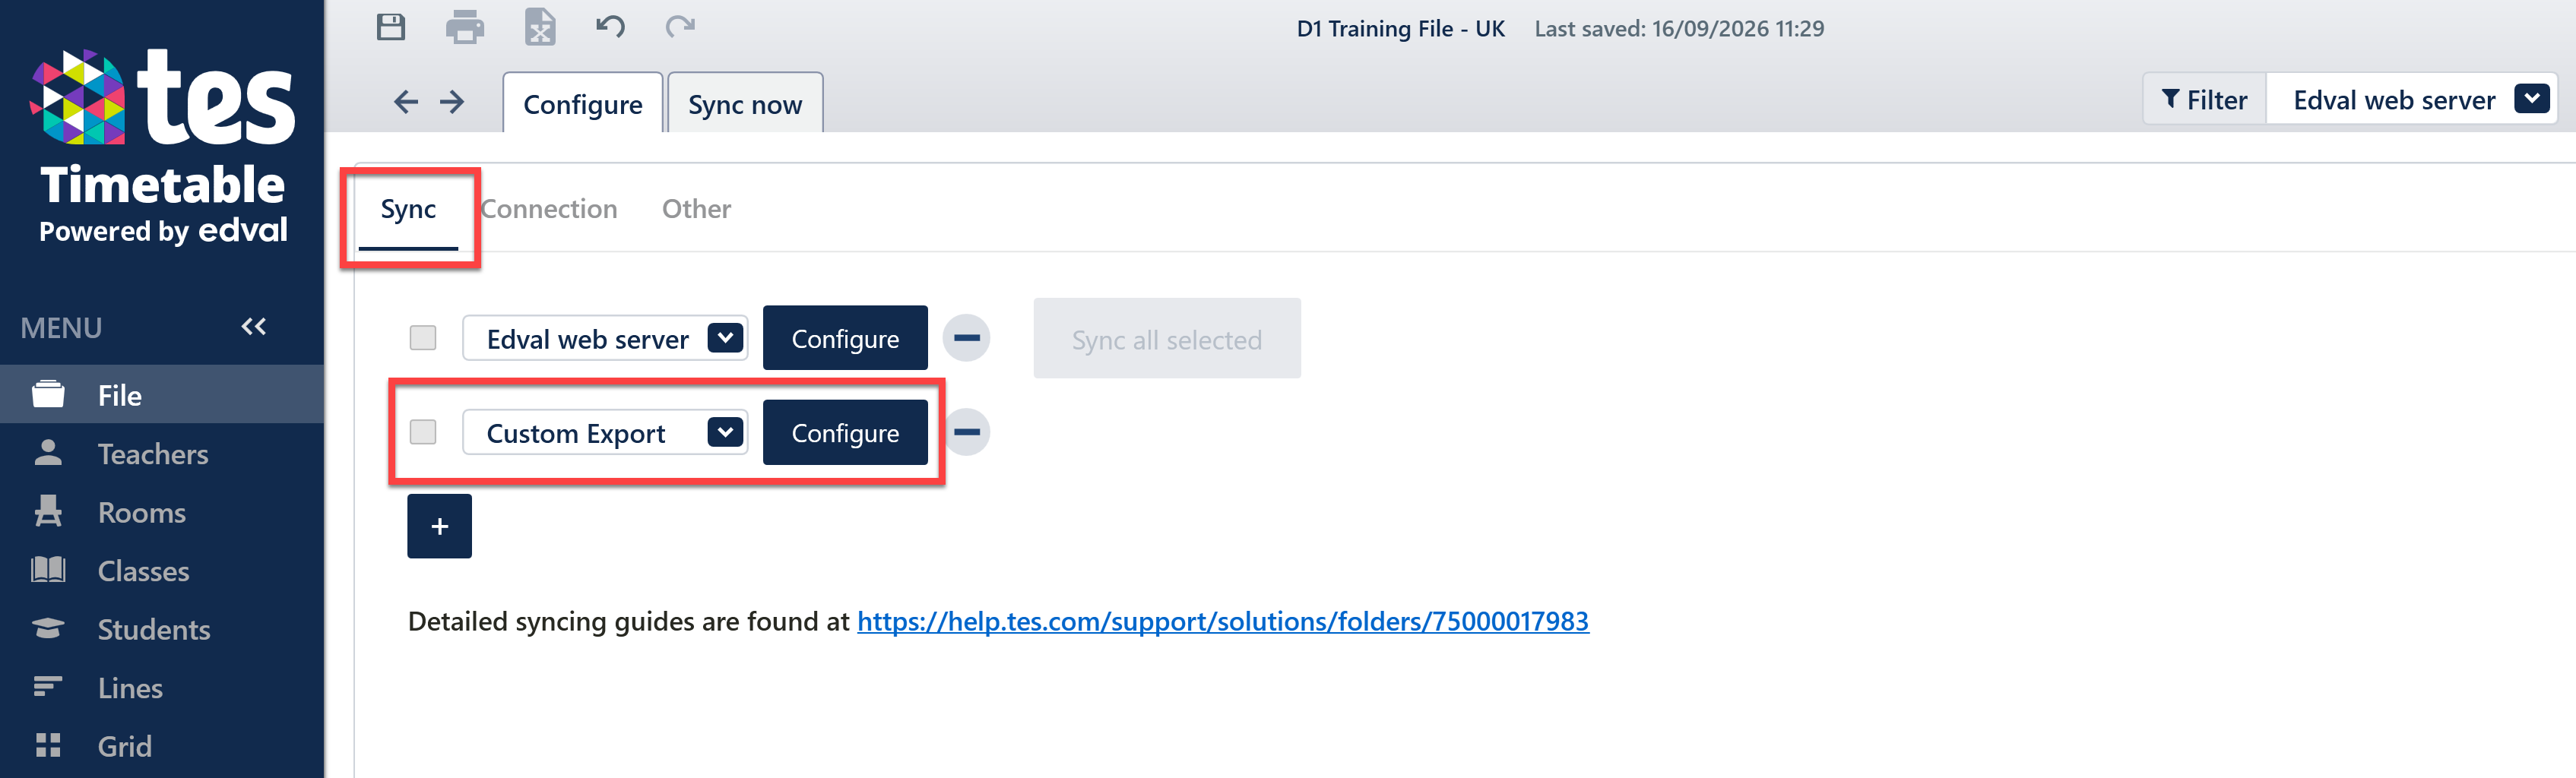
File>Synchronise>Configure>Sync
Press the blue plus button and then use the drop-down menu to select the 'Custom Export' option. Then press 'Configure'.
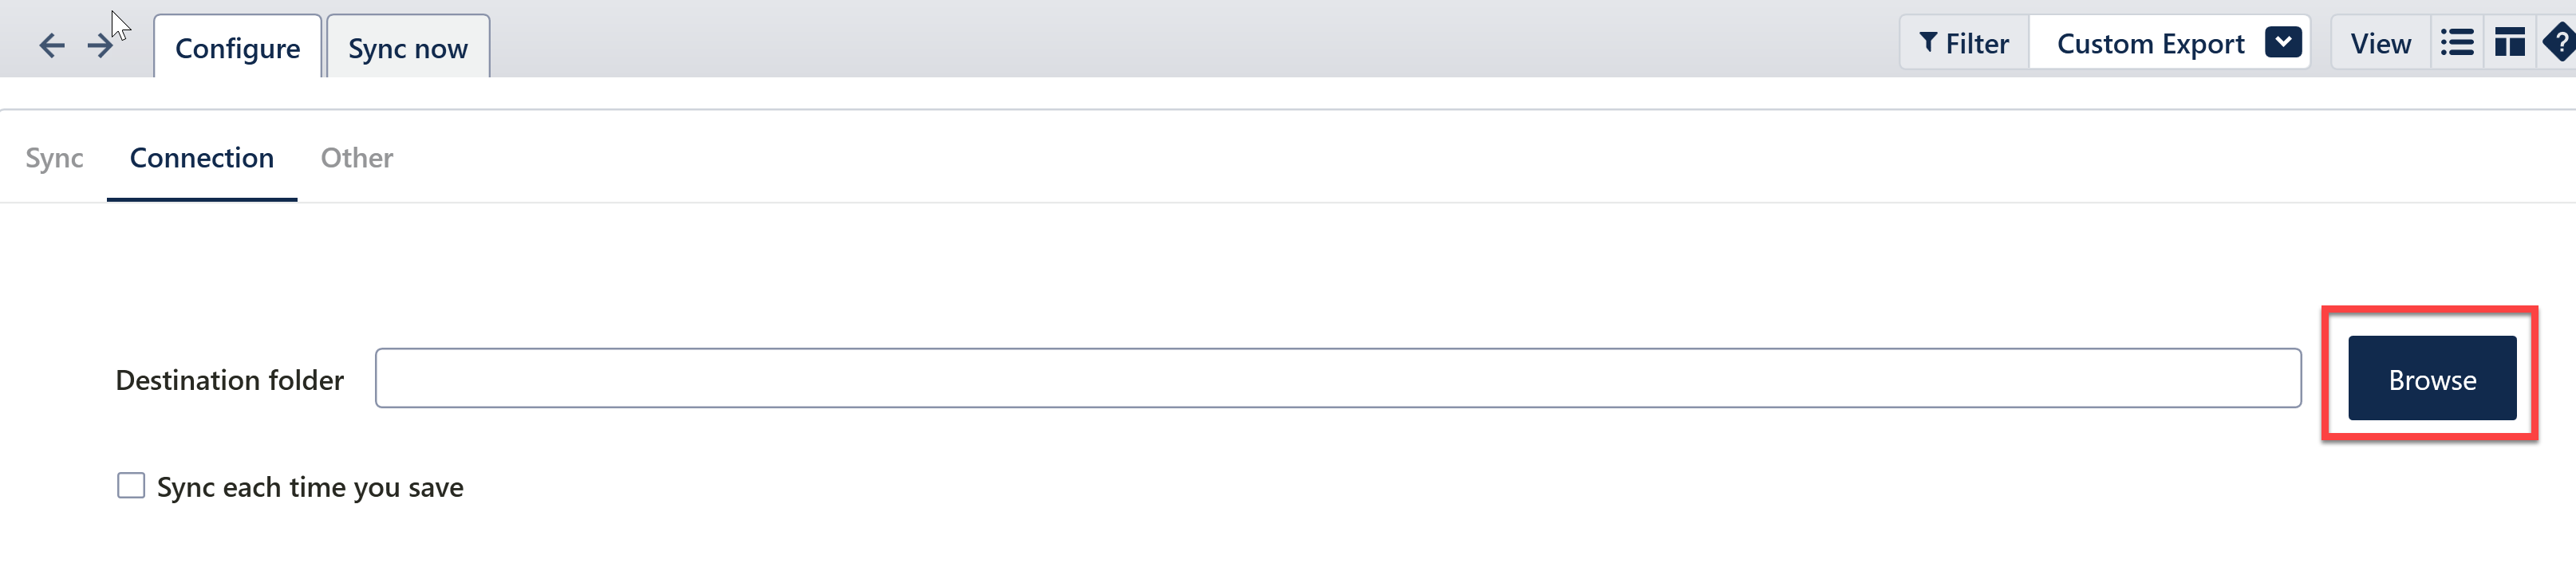
Press the Browse button and choose a file location on your computer where you'd like to save the exported spreadsheets. Then click the 'Other' tab beside Connection.
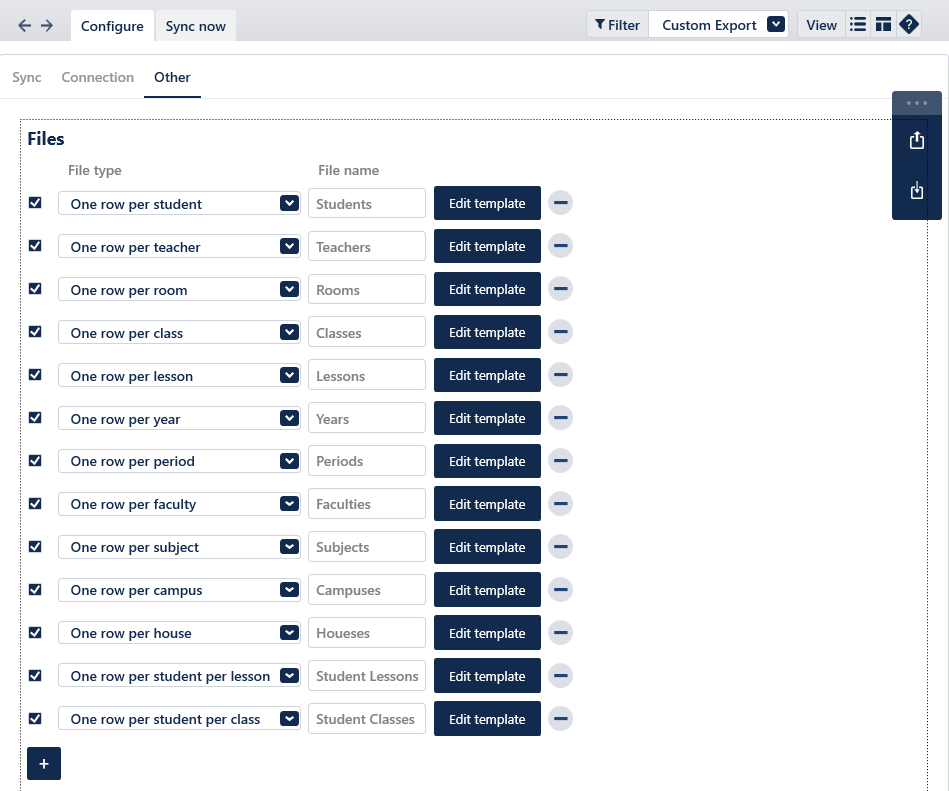
File configuration
The Custom Export can output many separate files, each with their own data template. These templates can be imported and exported between timetable files should you require it.
- File type
Files are given a type which dictates the context of the data template. For example, the default file type is 'One row per student' which means that if we have a template that has columns for name, code and classes, they will be generated per student. File types have a specified collection of data associated with them, which is based off of the columns in E10(see the Teacher data screen for 'One row per teacher'). - File name
Each file must have a name before it can be exported. For ease of use, please ensure that you name each file clearly as once they are generated it may be difficult to differentiate them.
Editing Templates
There are two settings that affect how all of the data is organised in the output file.
- Transpose data: allows us to swap rows and columns if we needed to, otherwise it is left unticked by default such that each column holds a separate category of data.
- Export column headers: toggles as to whether row 1 in the output file displays the headers or not.
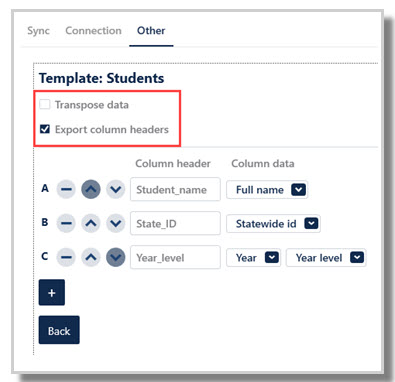
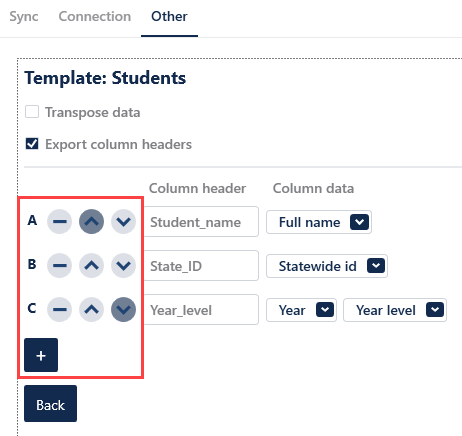
In the lower section we have the actual column data. We can add new columns with the plus button and remove them with the minus button on the very left of each row. We're also able to manipulate the order of our data by using the respective arrow buttons to move a row up or down the list.
In the column data dropdown list we have many options and these options can have sub options to export more specific data. They can become quite long and complex if necessary, however the below example isn't likely to happen.
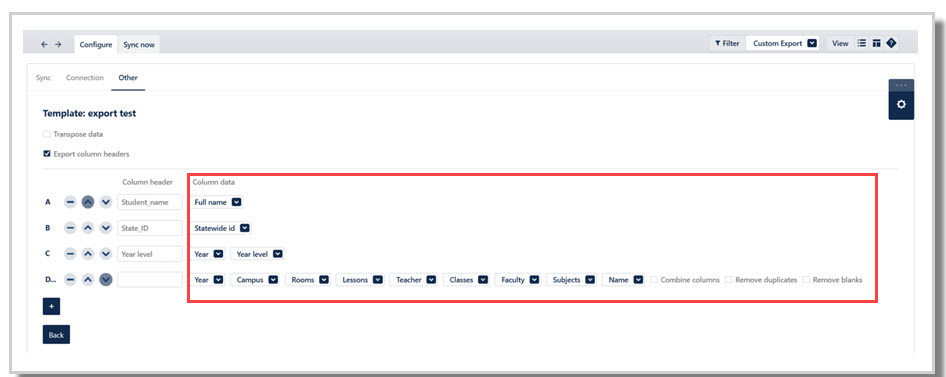
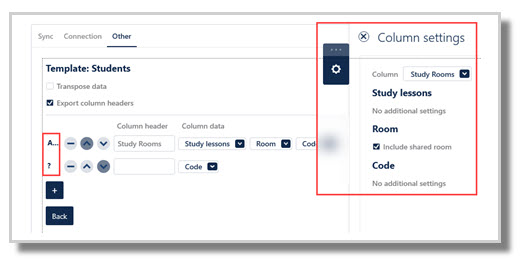
To understand what this column will export, it's easiest to start from the right and read it as 'Name of subject of faculty of...'. Additionally you have checkboxes appear for data that would output as a list, allowing you to have the data exist as one cell or multiple. In the case of multiple, the next set of data starts at the end of the list. This is why following entries are represented by a '?' in lieu of the following letter/number to compensate for not knowing the length of the list between them.
Column settings
The Action bar on the right shows more column/row settings. From here you are able to customise even further. Only a few of these actually have additional settings to chose from however so it's best to look through these at the end.
File type data
Per Student | Per Teacher | Per Room | Per Class | Per Lesson | Per Year | Per Period | Per Faculty | Per Subject | Per Campus | Per House | Per Student, Per Lessons | Per Student, Per Classes |
Code | Code | Code | Code | Room | Year level | Name | Classes | Course code | Code | Code | Student | Student |
Full name | Full name | Name | GUID | Teacher | Campus | Period | Subjects | Notes | Room | Name | Lesson | Class |
| First name | First name | Size | Rotations | Period | Students | Day | Teachers | Name | Year | Students | ||
Surname | Surname | Notes | Notes | Class | Subjects | Type | Max Students | Teachers | Teachers | |||
Email | GUID | GUID | Govt subject code | Study Class List | Classes | Classes | ||||||
Phone | Home group | Load | Start time | Years | ||||||||
Statewide ID | Phone | Home room of | Course code | End time | Faculty | |||||||
Comment | Notes | Campus | Class ID | Mapped period numbers | ||||||||
GUID | FTE | Lessons | # of periods | Lessons | ||||||||
Webcode | Gender | # of students | ||||||||||
| Indigeneity | Faculty | Type | ||||||||||
Boarder | House | Faculty | ||||||||||
Funding | Allowances | Lessons | ||||||||||
Gender | Home Room | Students | ||||||||||
Letter | Main Campus | Subject | ||||||||||
Number | Lessons | Year | ||||||||||
Year | Classes | Main teacher | ||||||||||
Study Lessons | Max load | Main room | ||||||||||
Classes | Total load | Teachers | ||||||||||
House | Load left | |||||||||||
Duties load | ||||||||||||
Allowances load | ||||||||||||
Studies load | ||||||||||||
Teaching load | ||||||||||||
Non-teaching load |
There is some crossover between templates where a file will have similar data sub-options, a prime example being the per student template. If you had a column for classes there, the sub-options are very similar to the per class options above, however the context is reliant on the file type.
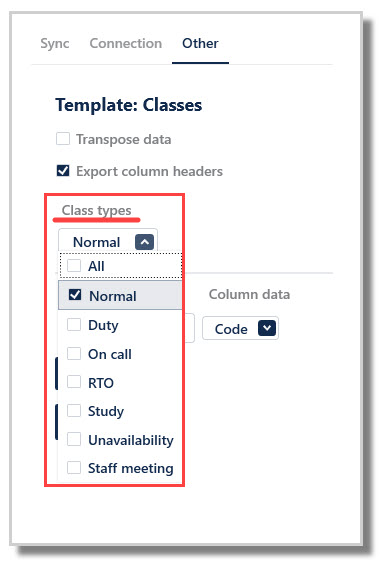
File types such as class, lesson, year & period have an additional dropdown in the template view for specifying type of classes, year groups & period types respectively.
Exporting
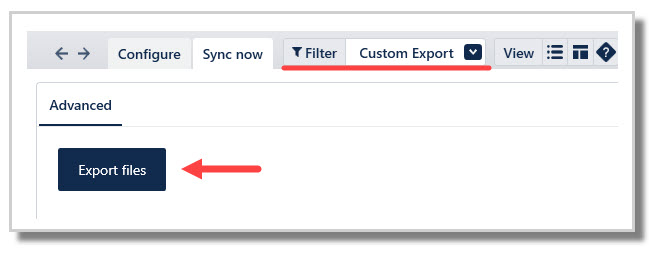
Once your files are configured to your liking, simply move to the 'Sync now' tab and select 'Export Files'. This will create the files in the folder you specified earlier. Should you lose track of the export you can retrace them by looking up the destination set in File > Sync > Configure > Connection.
Was this article helpful?
That’s Great!
Thank you for your feedback
Sorry! We couldn't be helpful
Thank you for your feedback
Feedback sent
We appreciate your effort and will try to fix the article