TABLE OF CONTENT
Preamble
There are several export options available in Tes Timetable that allow you to download your timetable data in a variety of formats, depending on your school’s administrative requirements.
This guide outlines the steps for exporting the current year’s timetable data. If you need to export information from previous years, you will first need to open the relevant .etz file and extract the data from within that file.
 If you try to open an older timetable file, you might see a pop up message saying that a licensing update is needed. This happens because the file was created using an older licence. If this message appears, just follow the steps shown in the pop up. Once the licence update is completed, you will be able to open the file as normal.
 Types of data available
1. Reports
There are many useful reports available via the Menu > Reports screen.
Users are encouraged to become familiar with them so they can be used effectively for a range of administrative and operational purposes.
Most reports are clearly titled and self‑explanatory, and can be easily exported to Excel if required.
The Exports section includes links to both general and region-specific reports. E10 can also generate a Student Programs export (StudentPrograms.txt), which can be imported directly into region‑specific curriculum authority systems such as VASS, NESA, and others.
Click here to see the relevant KB documents.

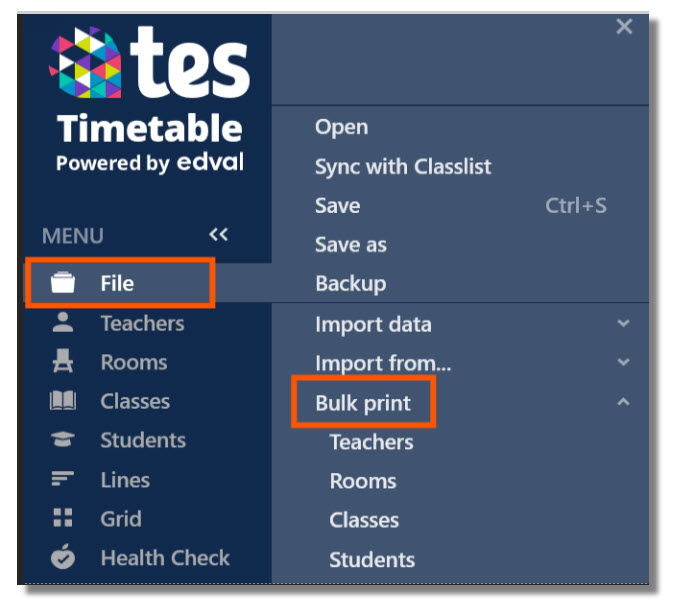
2. Bulk Print
Please navigate to File > Bulk Print to explore the bulk printing features. This area includes four distinct sections: Teachers, Rooms, Classes, and Students. Each section provides a range of layout, filter, and selection options, allowing you to customise the printing of timetables and lists to meet your school’s specific requirements.
For more information, please refer here.
Additional Printing Tools for Generating School-Wide and Year-Group Timetables
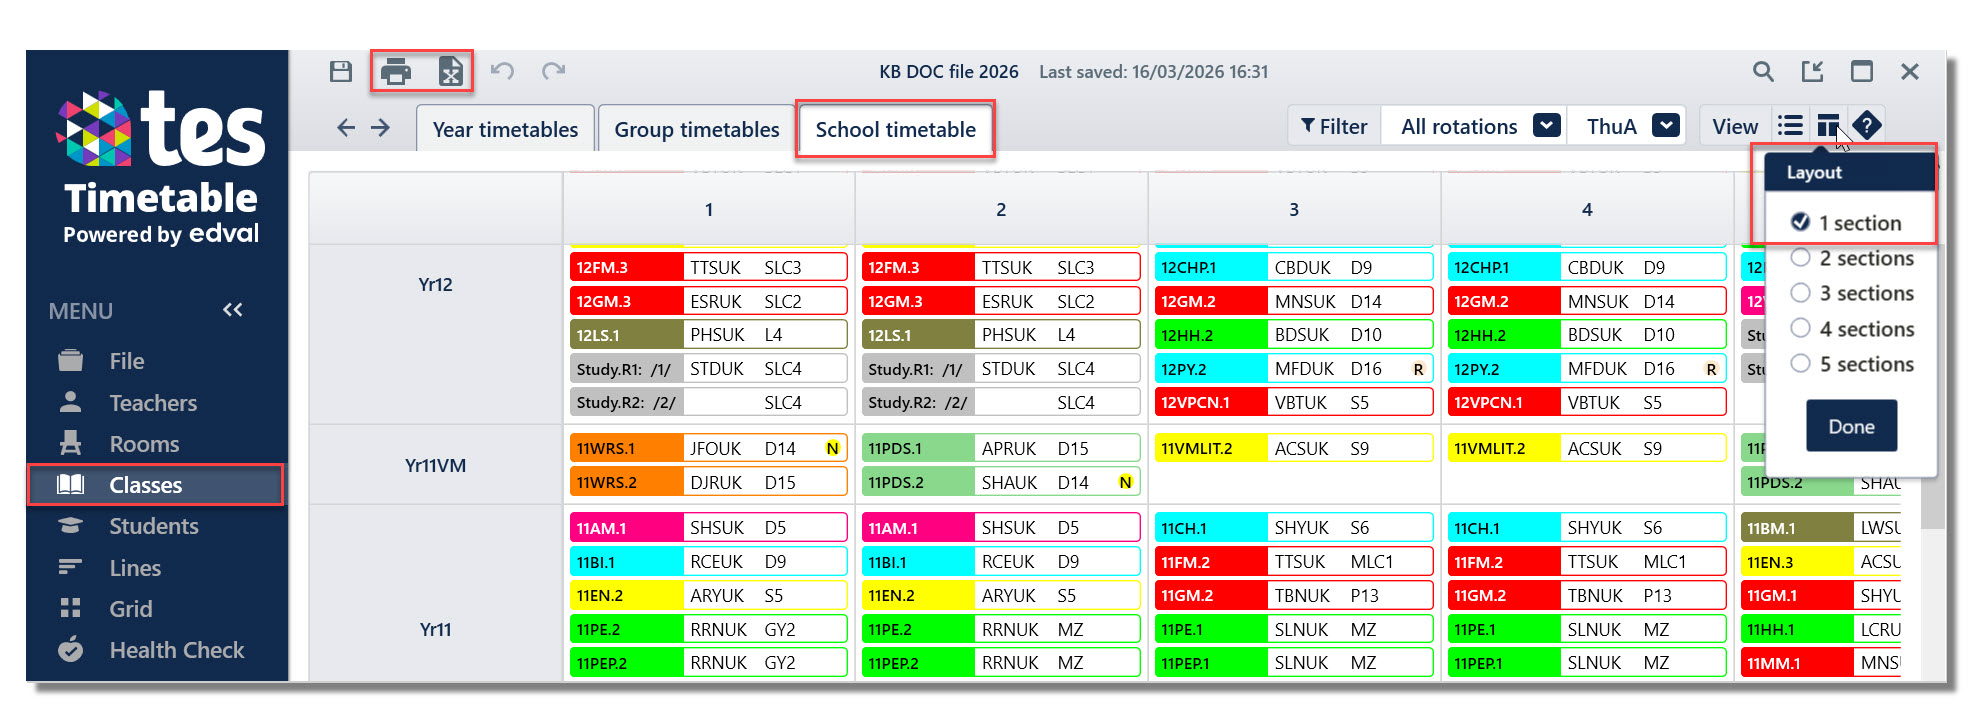
- Whole‑school timetables can be printed via Classes > School timetable.
Please note that this option is limited to a day‑by‑day view. You can select specific days using the Filter menu. There are additional fields that can be displayed via the View menu.
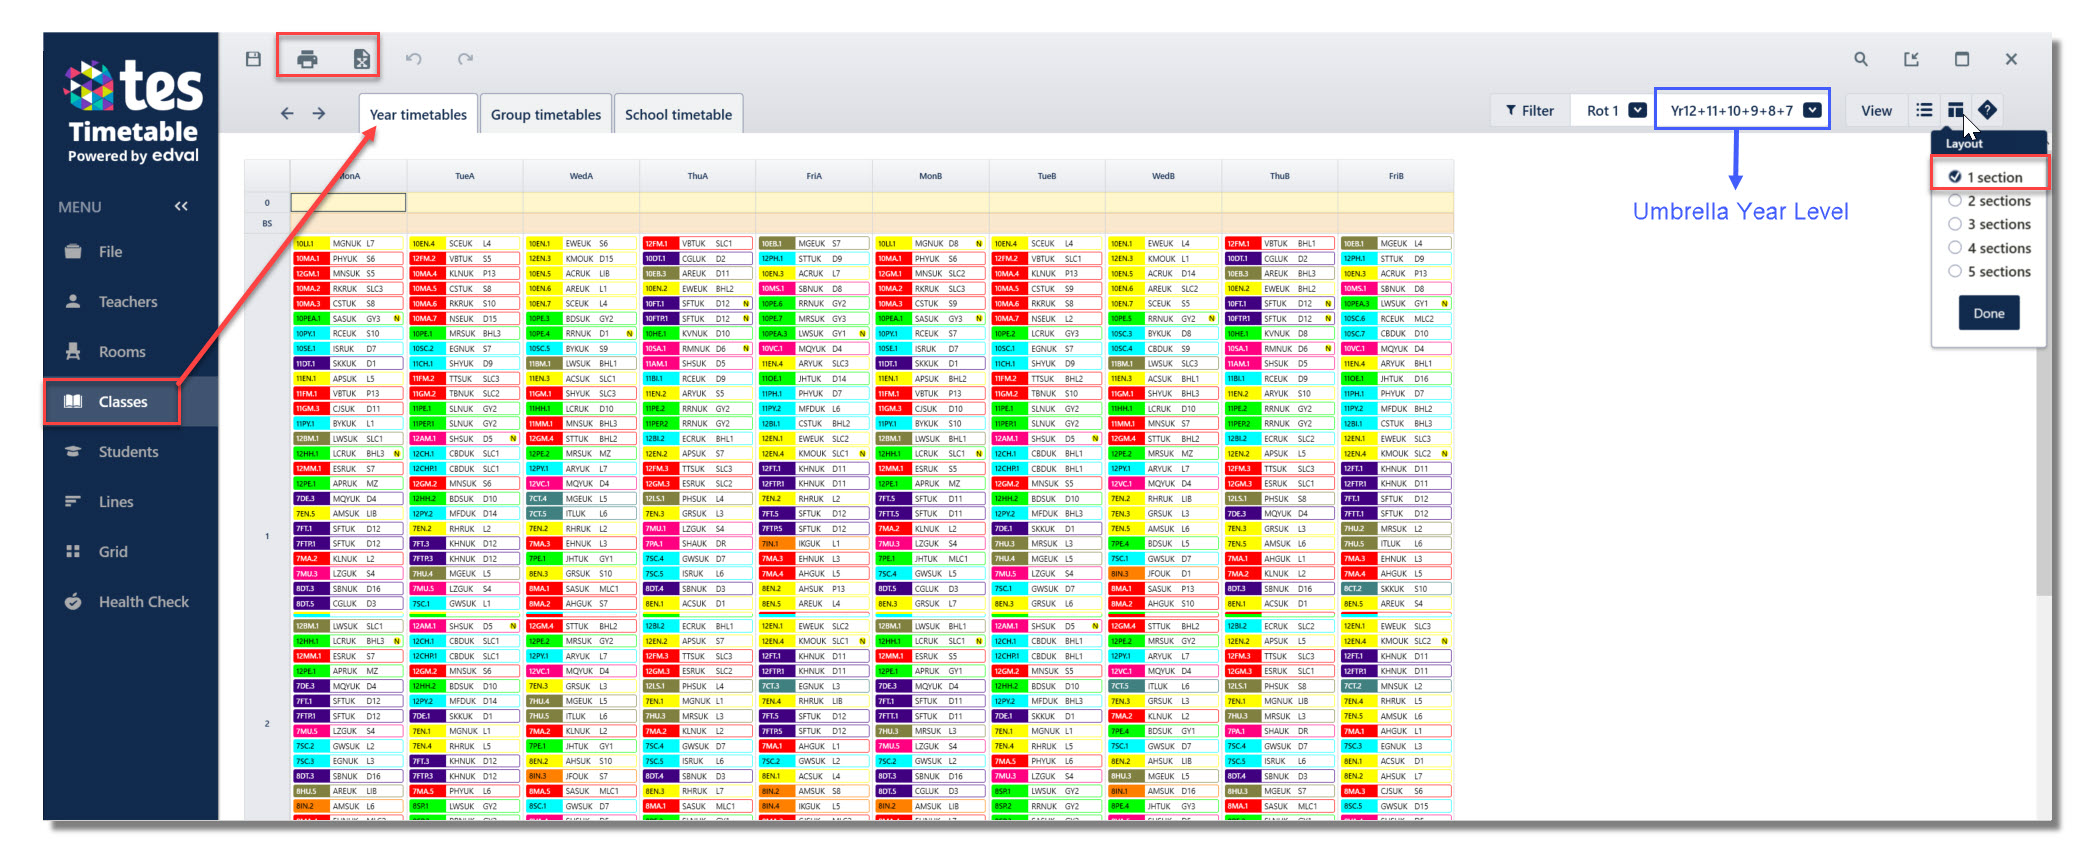
- A Year timetable (academic year) can be printed from Classes > Year Timetables tab. The corresponding academic year level can be selected from the Filter menu and the view can be customised via the View icons (located in the top‑right corner).
Selecting the “2 sections” option in the Layout menu may be the preferred choice for schools using a two‑week timetable.
To obtain a Year Timetable for all academic year levels, an Umbrella Year Level needs to be selected from the filter menu. This year level must first be created in the Admin > Setup > Year Levels screen. For more information on how to set up an umbrella year level, please click here.
Use the Quick Print or Export to Excel icon on the top left to export the timetables.
- To access all Teacher Timetables go to Teachers > Teacher master (by day). Compared to the Bulk Print option, this method allows you to include or exclude offline periods from the teachers’ timetables using the View selection menu.

3. Export Data
4. Custom Export
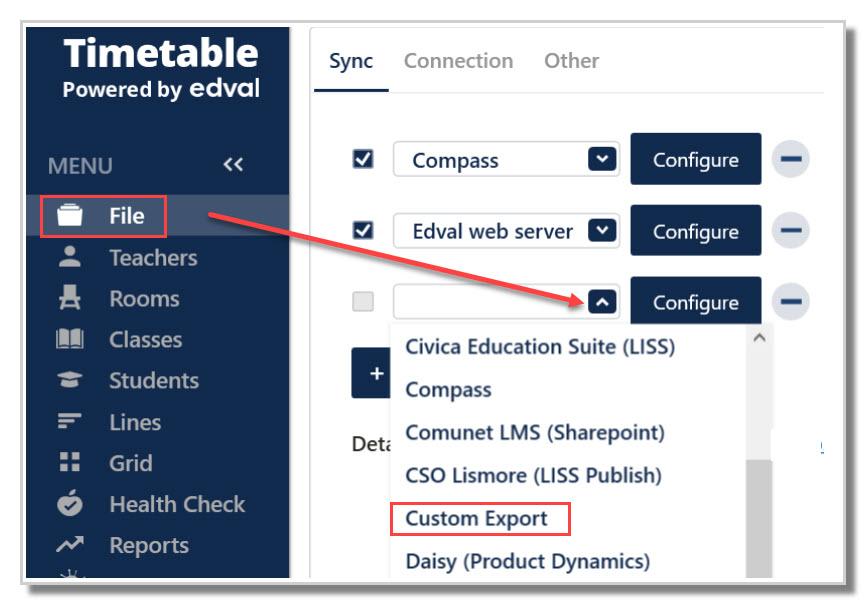
The Custom Export sync (File > Synchronise > Configure > Sync) allows users to create a CSV (Comma‑Separated Value) export tailored to the specific format and data requirements of external systems or for internal school use. This type of export is particularly valuable for:
- Exporting data in a format suitable for importing into external systems, or
- Exporting data in a customised structure for any school‑specific purpose.
For detailed instructions on configuring this export to meet your school’s requirements—and to learn how to avoid common setup issues—please click here.
5. Syncing to your Third Party Admin System
Timetabling data stored within TES Timetable files is often shared with one or more external (non‑TES) systems. To access synchronisation settings, navigate to File > Synchronise > Configure > Sync.
For assistance articles, guides, and troubleshooting information, use “Synchronisation” as your keyword when searching the TES Knowledge Base - Navigating the TES Knowledge Base.
Please be aware that information synced to external systems may remain accessible for an extended period, depending on how those systems store and retain data.
6. Screenshot from any screen of your E10 etz. file
A screenshot from any screen can be captured for future reference. For more information, please click on the link How to take a screenshot.
7. Export any screen to Excel (CTRL+X)
Navigate to the relevant window. If the Export button is active, the data is available to be exported as a spreadsheet.
Was this article helpful?
That’s Great!
Thank you for your feedback
Sorry! We couldn't be helpful
Thank you for your feedback
Feedback sent
We appreciate your effort and will try to fix the article