TABLE OF CONTENTS
- Preamble
- First steps to issue WebCodes:
- Issuing WebCodes to new students
- Export WebCodes into an Excel Spreadsheet
- Email WebCodes via the .etz file
- Communicating the WebCode to students and parents/guardians at the same time
Preamble
Each student needs a unique WebCode to access the Edval Web Server and submit subject preferences. WebCodes are generated on the first sync of the Choice form, stored in the .etz file, and sent to students when the form is ready for student submission.
This document covers the methods for communicating WebCodes to students from the .etz file.
- Export WebCodes (for mail-merge)
- Email WebCodes
NOTE
There are alternative ways to communicate Webcodes to students from the webserver Choice menu.
Refer to Choice: Export student WebCodes
Refer to Choice: Communicate to students via Email or Printed letter
First steps to issue WebCodes:
- Set up Elective data courses, form parameters and any desired selection rules.
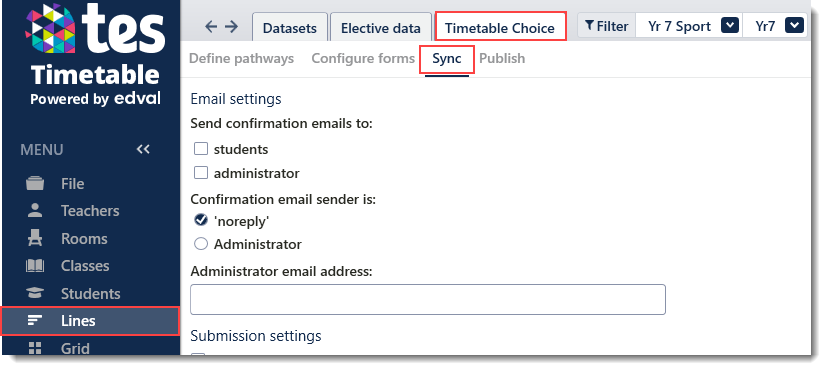
Refer to Elective data documentation for detailed guides on elective data set up. - Sync form: Lines > Timetable Choice > Sync
Refer to Choice: Sync form
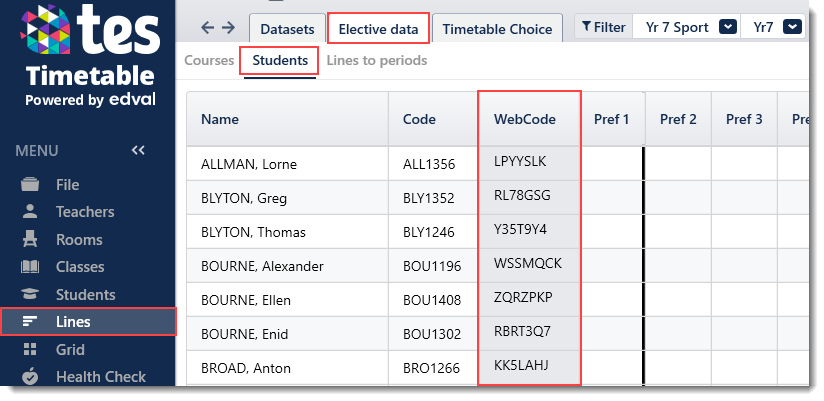
- Lines > Elective data > Students
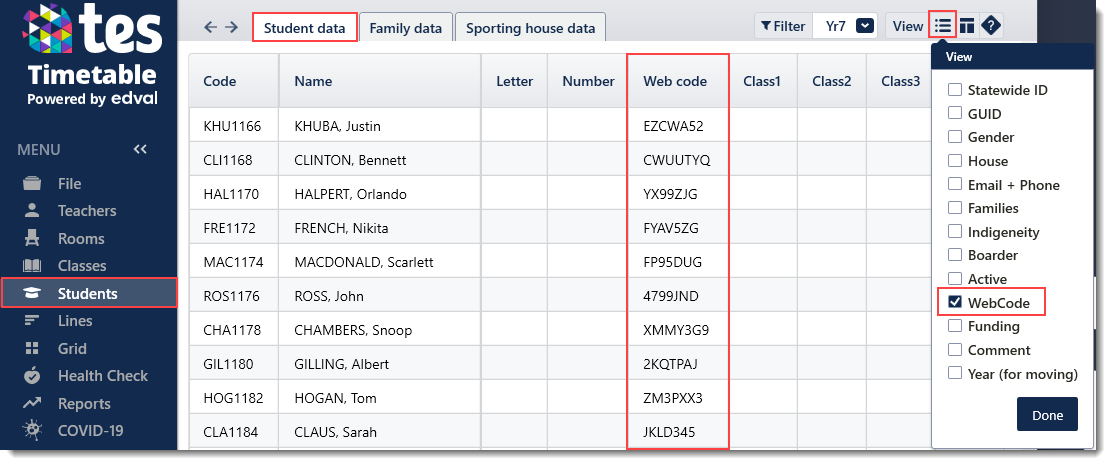
- Students > Student data. Ensure that Webcode is ticked in the View > Fields to show menu.
Issuing WebCodes to new students
- Add the student details to Students > Student data into the appropriate year level.
- Navigate to Lines > Edval Choice > Sync, selecting the relevant form from the menu.
- Sync.
Export WebCodes into an Excel Spreadsheet
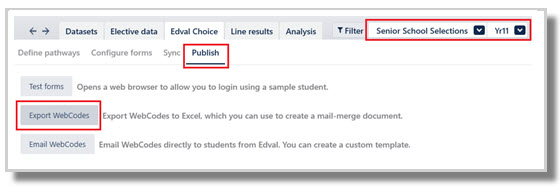
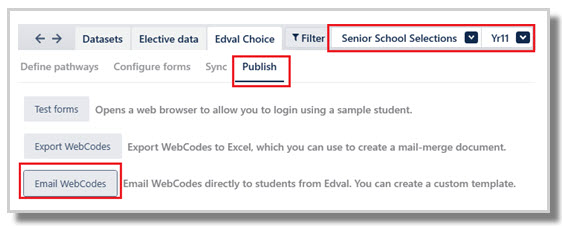
- Navigate to Lines > Timetable Choice > Publish.
- Select the desired dataset and year level from the dropdowns.
- Select Export WebCodes.
- A pop up will prompt to choose where to save the csv file. Choose the appropriate location.
- Mail-merge file to an existing school document.
NOTE
If using a multi-year dataset, the export will include WebCodes for all students from all year levels in the dataset.
Email WebCodes via the .etz file
Student email addresses must be stored within the .etz file to use the email WebCodes feature and can be easily imported into the existing Student data.
- Navigate to Lines > Timetable Choice > Publish.
- Select the desired dataset and year level from the dropdowns.
- Select Email WebCodes.
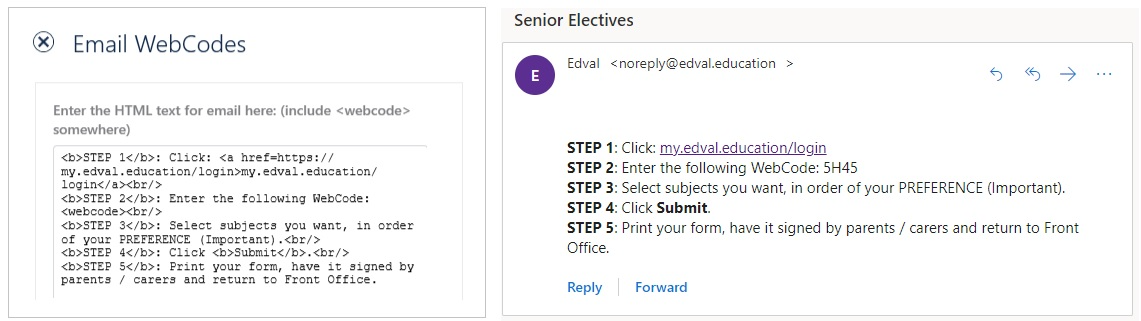
- Enter the text that will appear on the student email. Basic html coding may be used.
Refer to Choice: Basic HTML to use on forms and emails.
The image on the left below shows text, with some html, entered into Publish > Email WebCodes.
The image on the right shows how it appears on the email.
IMPORTANT
Ensure that the text <webcode> appears in the text somewhere, as this is the placeholder for each student's individual WebCode to be inserted.
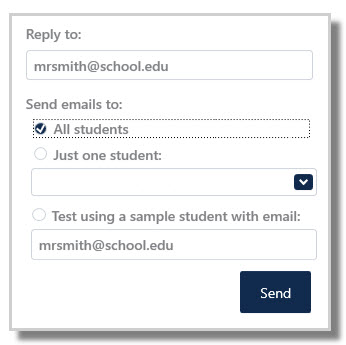
5. Enter the Reply to: email address.
6. Select Send email to: All students, or select one student from the dropdown list.
7. To test, select Test using a sample student with email and enter the recipient email address.
8. Click Send.
NOTE
If using a multi-year dataset, emails will be sent to the selected year level only.
TIP
Text used in this example, which may be copied, pasted and edited if desired.
<b>STEP 1</b>: Click: <a href= https://my.edval.education/login>my.edval.education/login</a><br/>
<b>STEP 2</b>: Enter the following WebCode:  <webcode><br/>
<b>STEP 3</b>: Select subjects you want, in order of your PREFERENCE (Important).<br/>
<b>STEP 4</b>: Click <b>Submit</b>.<br/>
<b>STEP 5</b>: Print your form, have it signed by parents / carers and return to Front Office.
Communicating WebCodes to students and parents/guardians at the same time
Schools that wish to send Choice-related communications such as student WebCodes and Choice form submission confirmations to both students and their parent or guardian can do so by following the process outlined below.
To ensure that both email addresses are included when issuing WebCodes, the parent/guardian email must already exist in your system before you sync your Choice form. If this data is not present at the time of syncing, the parent/guardian will not receive Choice communications.
Outline of steps:
1. Update Students > Student data.
2. In Lines > Timetable Choice, ensure confirmation emails are sent to students.
3. Lines > Timetable Choice > Sync, sync form.
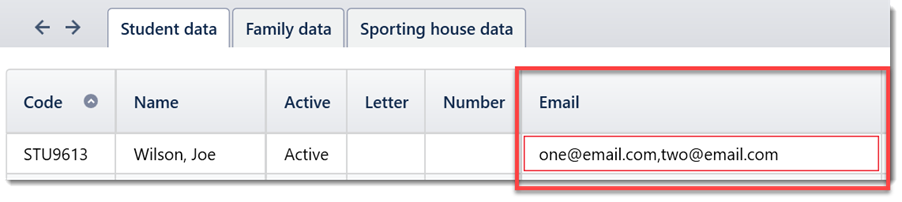
1. In Students > Student Data, make sure the Email column is visible. If it isn’t, open the View menu and select Email + Phone.
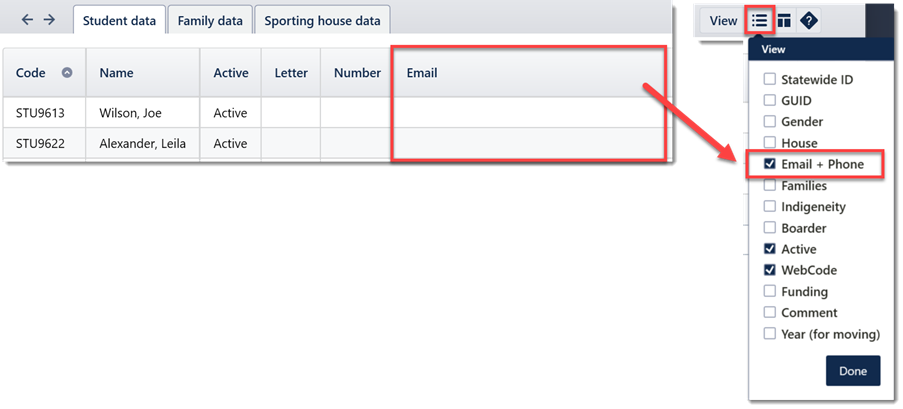
Under the Email column, enter the student’s email followed by the parent/guardian’s email. Use the format: one@email.com,two@email.com
The emails will be highlighted in red but this can be ignored.
Please note there must be no space between the email addresses; they should be separated only by a comma.
Follow the steps outlined above to issue the WebCode.
2. In Lines > Timetable Choice > Filter: (select the relevant dataset and year) > Sync. Under Email settings, Send confirmation emails to:, ensure students is ticked.
For both the student and parent/guardian to receive the Choice form submission confirmation email, this setting setting must be enabled.
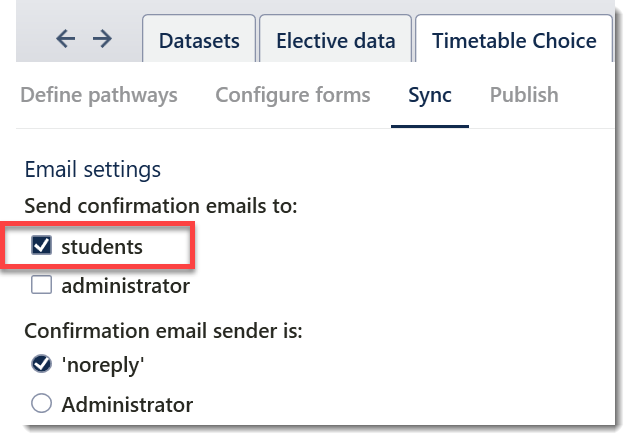
3. Sync the Choice form for these changes to take effect. The steps are outlined here: Choice: Sync form.
Please note: If you decide to add two emails under the Email field in Students > Student data, it is best practice to remove the parent/guardian’s email once the Choice forms have closed and lines are finalised, as this may cause issues when trying to communicate to students in the future via Daily.
Was this article helpful?
That’s Great!
Thank you for your feedback
Sorry! We couldn't be helpful
Thank you for your feedback
Feedback sent
We appreciate your effort and will try to fix the article